
Chicken Cutlet Recipe: Crispy Oven-Baked Perfection Every Time
Introduction
Looking for a healthier way to enjoy crispy, golden chicken cutlets without the mess and calories of deep frying? This oven-baked chicken cutlet recipe delivers restaurant-quality results with minimal effort and cleanup. You’ll get that satisfying crunch on the outside and juicy, tender meat on the inside, all while using just your oven. If you love easy chicken dishes, you’ll also want to check out our crockpot shredded chicken for another weeknight winner.
Whether you’re feeding picky kids, meal prepping for the week, or want a versatile protein that works in sandwiches, salads, or as a main dish, learning how to cook chicken cutlets in the oven is a game-changing kitchen skill. Plus, baking instead of frying means less oil, less mess, and more time to relax while dinner cooks itself. Looking for more easy chicken recipes? Browse our complete chicken recipes collection for endless inspiration.
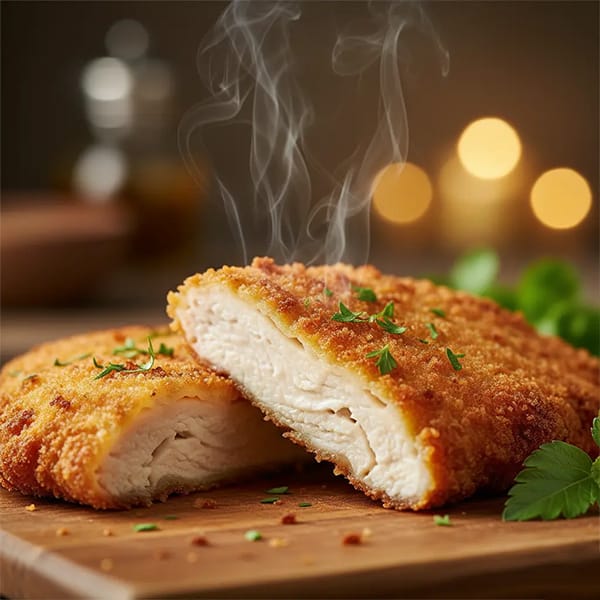
Table of Contents
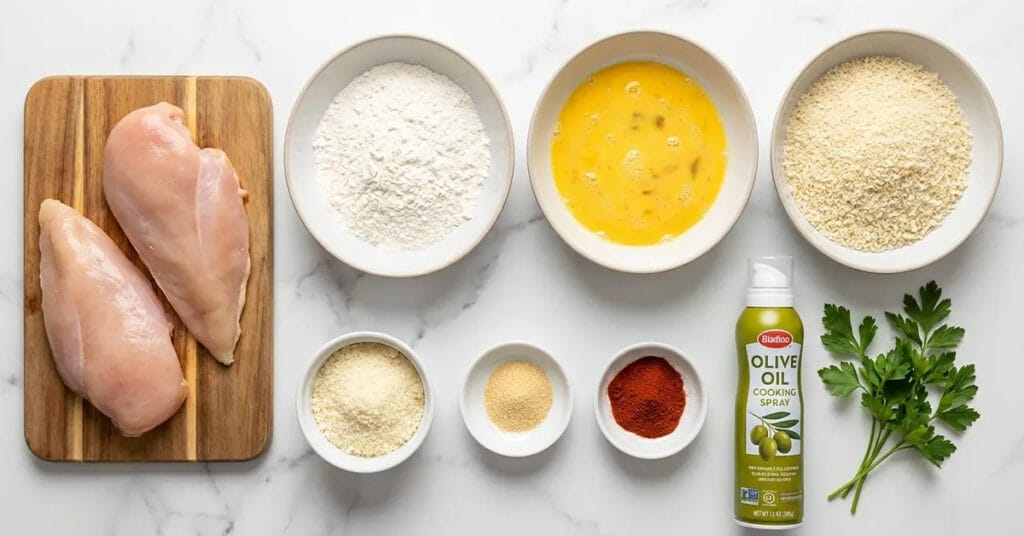
What You’ll Need
For the Chicken:
- 4 boneless, skinless chicken breasts (about 1.5-2 pounds)
- Salt and black pepper to taste
For the Breading Station:
- ½ cup all-purpose flour
- 2 large eggs
- 1 cup breadcrumbs (plain or Italian-style)
- ½ cup grated Parmesan cheese (optional but recommended)
- 1 teaspoon garlic powder
- 1 teaspoon paprika
- Cooking spray or olive oil for coating
Equipment:
- Meat mallet or rolling pin
- 3 shallow bowls or plates
- Baking sheet
- Parchment paper or aluminum foil
- Wire rack (optional but helps with crispiness)
The beauty of this breadcrumb chicken recipe is that you probably already have most ingredients in your pantry. No specialty items required!
How to Prepare Chicken Cutlets
Step 1: Prep Your Chicken
Place each chicken breast between two pieces of plastic wrap or parchment paper. Using a meat mallet or rolling pin, pound the chicken to an even ½-inch thickness. This ensures even cooking and creates the classic thin cutlet shape. According to USDA guidelines, uniform thickness helps chicken cook safely and evenly.
Step 2: Season the Chicken
Pat the chicken dry with paper towels, then season both sides generously with salt and pepper. Don’t skip this step – it’s crucial for flavor!
Step 3: Set Up Your Breading Station
Arrange three shallow bowls in a row:
- Bowl 1: All-purpose flour
- Bowl 2: Beaten eggs (whisk until smooth)
- Bowl 3: Breadcrumbs mixed with Parmesan, garlic powder, and paprika
This classic three-step breading process is the secret to perfectly coated chicken cutlets recipe.
Step 4: Bread the Cutlets
Take one cutlet and coat it completely in flour, shaking off excess. Dip it into the egg, letting extra drip off. Finally, press it firmly into the breadcrumb mixture, coating both sides thoroughly. Press gently so the breadcrumbs stick well. Place on a clean plate and repeat with remaining cutlets.
How to Cook Chicken Cutlets in the Oven
Step 1: Preheat Your Oven
Set your oven to 425°F. This high temperature is key for getting crispy chicken cutlets in oven without frying.
Step 2: Prepare Your Baking Sheet
Line a baking sheet with parchment paper or aluminum foil for easy cleanup. If you have a wire rack, place it on top of the baking sheet and spray it with cooking spray. The rack allows air to circulate underneath, creating crispier cutlets.
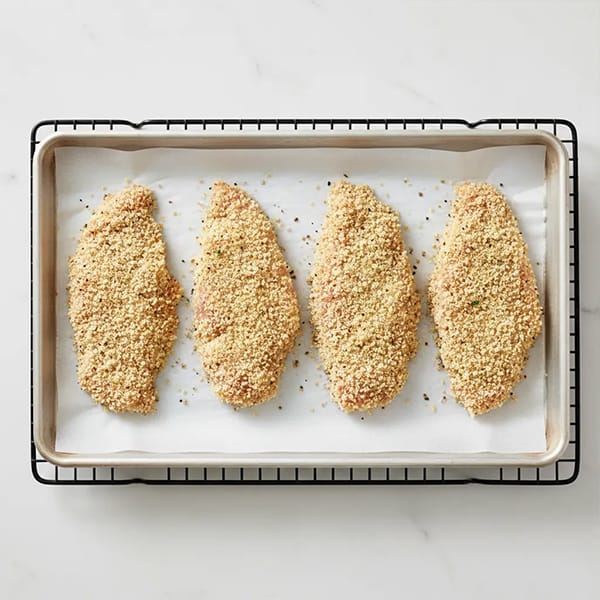
Step 3: Arrange and Oil the Cutlets
Place breaded chicken cutlets on the prepared rack or directly on the baking sheet, making sure they don’t touch. Lightly spray or brush the tops with olive oil or cooking spray. This helps achieve that golden, crispy finish.
Step 4: Bake to Perfection
Bake for 15-20 minutes, flipping halfway through at the 10-minute mark. The chicken cutlet is done when it reaches an internal temperature of 165°F and the coating is golden brown and crispy. For extra crispiness, broil for the last 1-2 minutes, watching carefully to prevent burning.
Step 5: Rest and Serve
Let the cutlets rest for 3-5 minutes before serving. This allows the juices to redistribute, ensuring every bite is moist and delicious.
Pro Tips for the Crispiest Results
Use Panko Breadcrumbs: Swap regular breadcrumbs for panko for an even crunchier texture. Panko creates lighter, crispier coating.
Don’t Skip the Oil Spray: Even though you’re baking, a light coating of oil is essential for browning and crispness. Without it, the breadcrumbs stay pale and soft.
Pound Evenly: Uneven thickness means some parts overcook while others undercook. Take an extra minute to pound each cutlet to a uniform ½-inch.
Let the Breading Set: After coating, let the cutlets sit for 10 minutes before baking. This helps the breading adhere better and reduces the chance of it falling off.
Use a Meat Thermometer: The only reliable way to know your chicken is perfectly cooked is checking the internal temperature. Invest in a good instant-read thermometer.
Work in Batches: Don’t overcrowd the baking sheet. Cutlets need space for air circulation. If necessary, use two baking sheets or cook in batches.
For more cooking techniques, Serious Eats offers excellent tips on perfecting breaded chicken.
Serving Ideas
Once you’ve mastered this chicken cutlet recipe, the possibilities are endless:
Classic Chicken Cutlet Sandwich: Place between toasted buns with lettuce, tomato, and mayo. Add pickles for extra tang. Try our chicken sandwich recipe for more delicious variations.
Chicken Parmesan: Top with marinara sauce and mozzarella cheese, then broil until melted. Serve over pasta for an Italian classic.
Cutlet Salad: Slice and serve over mixed greens with your favorite dressing for a protein-packed lunch. Pair it with our homemade salad dressings for extra flavor.
Chicken Cutlet Wraps: Roll in a tortilla with veggies and ranch or honey mustard.
With Sides: Pair with roasted vegetables, mashed potatoes, or rice for a complete dinner. Check out our roasted vegetable sides for perfect pairings, or browse our chicken recipes collection for more meal ideas.
Kids’ Favorite: Cut into strips and serve with ketchup or BBQ sauce as homemade chicken tenders. Similar to our chicken tenders recipe but even easier!
Storage and Reheating
Refrigerator: Store cooked cutlets in an airtight container for up to 4 days. Layer parchment paper between cutlets to prevent sticking.
Freezer: Freeze for up to 3 months. Freeze individually on a baking sheet first, then transfer to freezer bags. This prevents them from sticking together.
Reheating for Crispiness: The microwave makes cutlets soggy. Instead, reheat in a 375°F oven for 10-12 minutes until warmed through and crispy again. You can also use an air fryer at 350°F for 5-7 minutes for the crispiest results.
Make-Ahead Tip: Bread the cutlets ahead of time and refrigerate for up to 24 hours before baking. They’ll actually get crispier because the coating has time to set!
Common Questions
Can I use chicken thighs instead of breasts?
Absolutely! Boneless, skinless thighs work great and stay even juicier. Just adjust cooking time slightly as thighs may take a few extra minutes.
Why isn’t my breading sticking?
Make sure the chicken is completely dry before starting. Moisture prevents the flour from adhering. Also, press the breadcrumbs firmly onto the chicken and let them rest before baking.
Can I make these gluten-free?
Yes! Use gluten-free flour and gluten-free breadcrumbs. The method stays exactly the same.
How do I know when they’re done?
The safest way is using a meat thermometer. Chicken must reach 165°F internally. Visually, the juices should run clear and the meat should no longer be pink inside.
Can I freeze unbaked breaded cutlets?
Yes! Bread them completely, freeze on a baking sheet, then transfer to freezer bags. Bake directly from frozen, adding 5-7 minutes to the cooking time.
What’s the difference between chicken cutlets and chicken tenders?
Cutlets are pounded chicken breasts, while tenders are a specific strip of meat from the underside of the breast. Both can be breaded and cooked similarly.
Why This Recipe Works
The magic of this chicken cutlets in oven recipe comes from high heat and smart technique. At 425°F, the breadcrumbs toast quickly, creating that satisfying crunch while the chicken inside stays incredibly moist.
The three-step breading process isn’t just tradition – it’s science. The flour creates a dry surface for the egg to stick to, the egg acts as glue for the breadcrumbs, and the breadcrumbs create that golden crust we all crave. Skip any step and you’ll end up with patchy coating or soggy results.
Baking instead of frying also means you control the fat content while still getting amazing texture. According to Healthline, baked chicken can have significantly fewer calories than fried versions while maintaining similar protein content.
Final Thoughts
This oven-baked chicken cutlet recipe proves you don’t need a deep fryer to achieve crispy, delicious results. With simple ingredients, straightforward technique, and your oven doing most of the work, you’ll have golden breadcrumb chicken that rivals any restaurant version.
The best part? Once you master how to cook chicken cutlets this way, you’ll find yourself making them weekly. They’re perfect for meal prep, family dinners, and everything in between. Kids love them, adults appreciate them, and everyone enjoys that satisfying crunch.
Start with this classic version, and once you’re comfortable, feel free to experiment with different seasonings in your breadcrumb mixture. But honestly, sometimes the simple classics are the best.
Ready to make the crispiest oven-baked cutlets ever? Grab your ingredients and let’s get cooking!